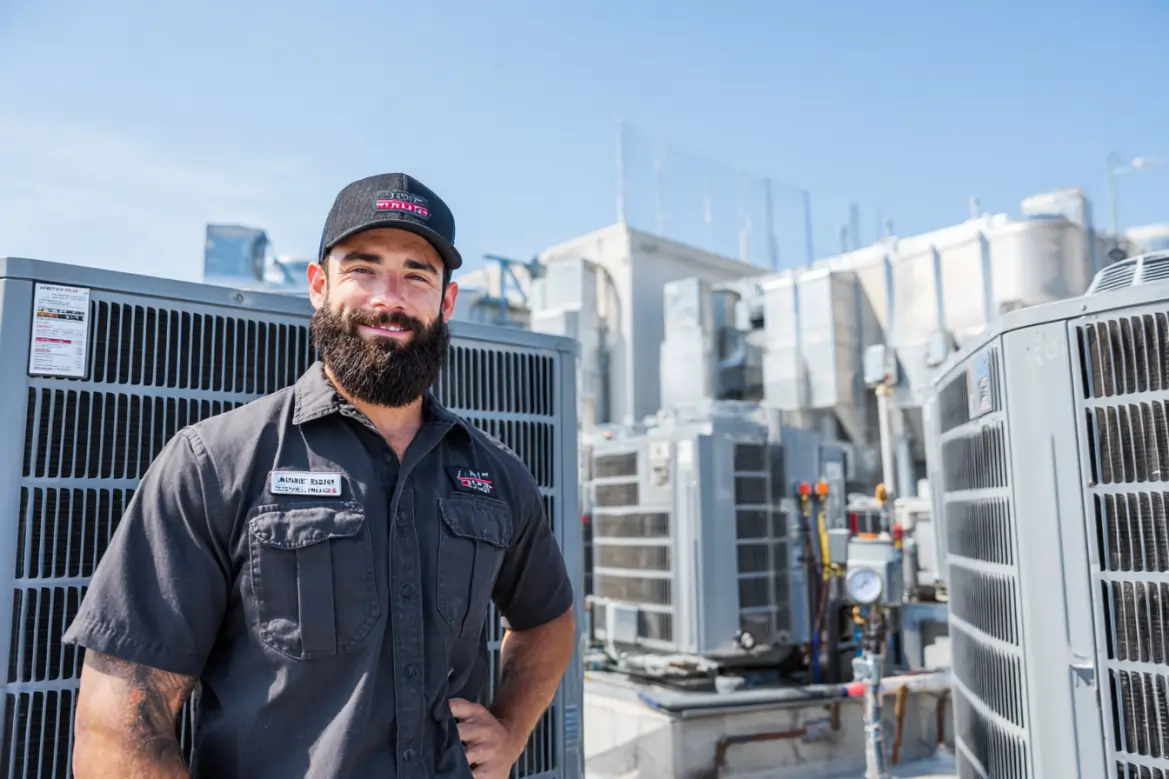
Repairman cleaning and fixing indoors AC unit. stock photo

When it comes to maintaining your HVAC system, hiring a certified professional is one of the most important steps you can take. Certified HVAC companies possess the expertise, tools, and skills required to ensure your system operates efficiently and reliably. Below are some distinct advantages of working with a certified HVAC company.

Access to Expertise and Industry Knowledge

Certified technicians undergo extensive training and certification processes that equip them with advanced knowledge about HVAC systems. This professional experience ensures that they can handle a wide range of issues, including:
– Diagnosing complex mechanical or electrical problems
– Repairing modern, energy-efficient heating and cooling systems
– Understanding manufacturer specifications for installation and maintenance

Their certifications also indicate that they stay current with evolving industry standards and technologies.

Improved System Efficiency

Properly repaired HVAC systems operate at peak efficiency, reducing energy waste. Certified professionals focus on fine-tuning your unit during repairs to achieve optimal performance. Benefits include:
– Lower utility bills due to more efficient operation
– Consistent indoor temperatures throughout the year
– Enhanced air quality through proper filtration and ventilation repairs

By improving your system’s efficiency, you also contribute positively to environmental sustainability through reduced energy usage.

Greater Safety Assurance

HVAC systems involve electrical components, refrigerants, gas lines, and other elements that can pose safety risks when mishandled. Certified technicians follow strict safety guidelines during repairs to prevent dangers such as:
– Carbon monoxide leaks from malfunctioning furnaces or boilers
– Electrical fires caused by faulty wiring or improper installations
– Refrigerant leaks that could harm both occupants and the environment

Hiring a certified company minimizes these risks while providing peace of mind for homeowners.

Warranty Protection on Your System

Many manufacturers require repairs or maintenance work on their equipment to be performed by certified professionals in order to maintain warranty coverage. Choosing an uncertified technician may void your warranty altogether. Working with a certified HVAC company helps ensure that:
1. Repairs follow manufacturer recommendations.
2. Warranty terms remain intact in case future issues arise.

This level of protection saves you from unexpected out-of-pocket expenses down the line.

Tools, Technology, and Quality Parts

Certified companies invest in state-of-the-art tools and diagnostic equipment designed specifically for modern HVAC systems. They also have access to high-quality replacement parts directly sourced from trusted vendors or manufacturers, ensuring durable solutions for your repair needs.

Benefit Certified Technicians Non-Certified Technicians
Training Extensive training & certifications May lack formal training
Warranty Preservation Maintains warranty validity Could void warranties
Safety Protocols Follows established safety measures May risk improper handling
Quality Replacement Parts Access to OEM-approved components Limited part availability

Reliable Long-Term Results

Professional repairs completed by certified technicians are typically more reliable over the long term compared to quick fixes by unqualified individuals. Whether it’s resolving airflow issues or replacing faulty components, these experts aim for sustainable solutions rather than temporary fixes.

Final Thoughts on Hiring Certified Professionals

Investing in professional help from a certified HVAC company provides unmatched value when it comes to protecting one of the most critical systems in your home. From improved efficiency and safety compliance to safeguarding warranties, the advantages are clear—choosing skilled experts ensures high-quality work you can trust year-round while potentially saving money in both energy costs and future repairs over time.

Key Things to Consider Before Hiring an Expert for AC Repair San Antonio TX

When your HVAC system needs repair or maintenance, hiring the right contractor is essential to ensure the job is done properly. Not all contractors are created equal, and choosing the wrong one can lead to costly mistakes. Below are key factors to consider when selecting an experienced HVAC contractor.

1. Proper Licensing and Certification

One of the most important attributes of a reputable HVAC contractor is proper licensing and certification. These credentials confirm that they have met the requirements set by local and state authorities to operate legally and safely.

  • State Licensing: Verify that the contractor holds valid state licensing for HVAC services.
  • NATE Certification: Look for contractors certified by North American Technician Excellence (NATE), a widely recognized organization in the industry.
  • Insurance Coverage: Ensure they carry liability insurance to cover potential accidents or damages.

2. Proven Experience in the Field

Experience goes hand-in-hand with quality service. Contractors with several years in business are more likely to have encountered a variety of HVAC issues, making them better equipped to handle complex repairs or installations.

Questions you can ask include:
– How long have you been in business?
– Have you serviced systems similar to mine before?

3. Strong References and Reviews

A dependable contractor should be able to provide references from past clients. Additionally, online reviews on platforms like Google, Yelp, or Better Business Bureau (BBB) can give further insight into their reputation.

What to look for in reviews:
– Positive feedback on punctuality and professionalism. – Clear communication throughout projects. – Reliability in resolving problems effectively.

4. Transparent Pricing Structure

A professional HVAC contractor should provide written estimates before starting any work. Transparent pricing ensures no hidden fees will appear on your bill later.

Ask about:
– Free estimates versus paid inspections. – Whether rates are hourly or flat-rate based. – Warranty details for both labor and parts used during repairs.

5. Detailed Written Contracts

Before hiring a contractor, ensure all agreements are documented in a detailed contract. This protects both parties by clearly defining expectations, costs, timelines, warranties, and other pertinent details.

Key elements your contract should include:
| Section | Details |
|————————|——————————————–|
| Scope of Work | Specific tasks that will be performed |
| Timeline | Project start date and completion timeline|
| Payment Terms | Installment schedules or lump-sum payments|
| Warranty Information | Coverage period for parts/services |

6. Commitment to Energy Efficiency

High-quality contractors prioritize energy-efficient solutions tailored to your needs. They may recommend upgrading older systems with modern options like ENERGY STAR-certified products or suggest routine maintenance plans designed to optimize performance while lowering energy costs.

Some questions worth asking:
1. Can you help identify ways I can improve my home’s energy efficiency?
2. Do you offer energy-saving maintenance packages?

7. Emergency Services Availability

HVAC issues don’t always arise during regular business hours; therefore, it’s helpful if your contractor provides emergency services whenever needed.

Check whether they offer:
– On-call support during weekends/holidays. – A hotline or designated contact number for emergencies.

Hiring an experienced HVAC contractor involves careful consideration of qualifications, transparency, and customer satisfaction history—all of which contribute towards ensuring high-quality service while protecting your investment long-term.

Male repair air conditioner at the room, He is air technician, mechanic, engineer. Maintenance air conditioner myself.soft focus stock photo

Essential Tips for Choosing the Best Air Conditioning Repair San Antonio TX Professionals

Licensing and Certifications

  • Verify that the contractor holds the proper licensing required by your state or region.
  • EPA Section 608 Certification (mandatory for handling refrigerants).

These qualifications demonstrate a technician’s knowledge and adherence to industry standards.

Experience in the Field

  • Check how many years of experience the contractor has in providing HVAC services. Professionals with several years of experience are more likely to have encountered a wide variety of issues and know how to address them efficiently.
  • Ask if they specialize in your specific type of system (e.g., central air conditioning, ductless mini-splits, heat pumps).

Insurance Coverage

Ensure the contractor carries both:
1. Liability Insurance – Protects against damages caused during repairs or installations.
2. Worker’s Compensation Insurance – Covers injuries that their workers may sustain while on the job.

This protects you financially in case of accidents or errors.

References and Reviews

  • Request references from past clients to gauge customer satisfaction. Speak directly with these references if possible, as this can provide insights into their reliability and professionalism.
  • Feedback about punctuality and communication skills.
  • Consistency in delivering quality work on time.

Written Estimates and Transparent Pricing

  • Obtain detailed written estimates from at least three contractors before making a decision. This ensures you understand what you’re paying for upfront without unexpected surprises later on.
  • Avoid contractors who offer lowball quotes without thorough assessments—they might cut corners or charge hidden fees later.

Warranty Options

Ask about warranties provided on both labor and parts: – A reputable contractor should stand behind their work by offering guarantees. – Manufacturers often provide warranties for equipment; ensure these remain valid by using licensed professionals for installation/repairs.

Warranty Type Coverage
Labor Warranty Protects against poor installation practices
Parts Warranty Covers manufacturer defects or failures

Availability During Emergencies

HVAC systems often fail unexpectedly—and typically at inconvenient times! Consider whether the contractor offers:
– Emergency repair services during nights, weekends, or holidays. – Rapid response times for urgent situations such as system breakdowns during extreme weather conditions.

Use of Modern Tools and Techniques

An experienced HVAC technician should employ updated diagnostic tools and follow modern techniques to identify problems accurately: – Digital gauges for system diagnostics. – Thermographic imaging tools for detecting airflow issues.

A well-equipped contractor brings efficiency in diagnosing issues while minimizing potential damage during repairs.

By considering these factors thoroughly before hiring an HVAC professional, you’ll increase your chances of receiving dependable service that extends the longevity of your system while maximizing performance efficiency over time.

The Benefits of Hiring a Certified HVAC Company San Antonio TX for Repairs

When it comes to HVAC repairs, choosing trained and certified technicians is essential. Their experience, education, and proper certifications ensure that your system is repaired efficiently, safely, and in compliance with industry standards. Below, we delve into the key benefits of hiring certified professionals for your HVAC repair needs.

Expertise and Knowledge

  • Diagnose problems accurately without unnecessary guesswork.
  • Work on advanced systems such as energy-efficient units or smart thermostats.
  • Stay up-to-date with the latest tools, technologies, and repair methods.

Their knowledge ensures that repairs are not only effective but also tailored to your specific system requirements.

Compliance with Safety Standards

  • Electrical hazards or short circuits.
  • Refrigerant leaks that pose environmental risks.
  • Carbon monoxide leaks from malfunctioning furnaces.

Certified technicians follow strict safety protocols and are familiar with local building codes and regulations. This minimizes risks during repairs while ensuring your system operates safely.

Cost Savings Over Time

  1. Preventing repeated breakdowns through precise repairs.
  2. Extending the lifespan of your HVAC system by addressing root causes of problems.
  3. Improving energy efficiency through optimized performance.
Service Type Potential Cost Without Certification Potential Savings With Certified Technician
Refrigerant Recharge $400-$600 due to improper handling $200-$300 when done accurately
Furnace Repair Risk of additional damage (~$500+) Minimal follow-up costs

Investing in qualified technicians upfront reduces both immediate expenses and future repair needs.

Access to Quality Tools and Parts

Certified technicians use industry-grade tools designed for precision work. They also have access to authentic replacement parts that maintain the integrity of your system’s manufacturer warranty—a benefit not guaranteed when using uncertified services or off-brand components.

Enhanced System Efficiency

  • Cleaning air ducts for better airflow.
  • Calibrating thermostats for more accurate temperature control.
  • Inspecting insulation around ductwork to reduce energy loss.

Improved efficiency translates into reduced utility bills—a constant benefit for homeowners seeking long-term savings.

Peace of Mind Through Guarantees

Most certified HVAC companies stand behind their work with warranties on both labor and parts used during repairs. This commitment ensures greater accountability while giving you confidence in the quality of service provided.

Working with trained and certified HVAC technicians is ultimately an investment in safety, efficiency, cost savings, and peace of mind. Their attention to detail guarantees that your system will function reliably while adhering to industry best practices. For any homeowner looking for dependable repair solutions, choosing certified professionals is a choice that yields lasting benefits.

Understanding Why Air Balancing is Crucial for Optimizing Your Home’s HVAC System

Air balancing is a critical yet often overlooked aspect of maintaining an efficient and comfortable home. It involves adjusting your HVAC system to distribute air evenly throughout your living space. Proper air balancing ensures that every room in your home gets the right amount of airflow, maintaining consistent temperatures while optimizing energy efficiency. Below, we delve into why this process is essential and how it can benefit your HVAC system and household.

What Is Air Balancing?

Air balancing is the process of measuring and adjusting the airflow within an HVAC system to achieve optimal performance. Technicians use specialized tools, such as airflow meters and manometers, to detect inconsistencies in airflow or pressure across the ductwork. The goal is to eliminate hot or cold spots, improve indoor air quality, and ensure energy efficiency.

Benefits of Proper Air Balancing

  1. Even Temperature Distribution: No more hot or cold spots in different rooms.
  2. Consistent Airflow: Maintains a uniform flow across all areas of your home.
  3. Reduced Energy Waste: Prevents the overworking of HVAC units due to imbalanced airflow.
  4. Lower Utility Bills: An optimized system uses less electricity or fuel.
  5. Reduced Wear and Tear: Proper air balancing decreases strain on components like fans or blowers.
  6. Fewer Repairs Needed: A balanced system operates more effectively, reducing the likelihood of breakdowns.
  7. Even Distribution of Filtered Air: Ensures that clean, fresh air reaches every part of your home.
  8. Reduction in Stale Areas: Eliminates zones where air stagnates due to uneven circulation.

Signs Your Home May Need Air Balancing

  • Rooms that are consistently warmer or cooler than others.
  • Unusual noises from vents due to high pressure or resistance within ductwork.
  • Increased utility bills without any significant changes in usage patterns.
  • Difficulty maintaining a consistent temperature with your thermostat settings.

If you notice any of these symptoms, it may be time to schedule a professional assessment with an HVAC technician experienced in air balancing.

Steps Involved in the Air Balancing Process

Step Description
Assessment Technicians measure current airflow levels using specialized instruments.
Adjusting Dampers Registers and dampers are adjusted to regulate airflow across duct branches.
Testing Pressure Static pressure readings ensure proper balance between supply and return ducts.
Sealing Ducts Any leaks are sealed to prevent loss of conditioned air during distribution.

Each step ensures that every component within the ventilation network works harmoniously for optimal performance.

Why Seek Professional Help?

Air balancing requires expertise, technical knowledge, and precision tools that homeowners typically do not have access to. Certified professionals not only conduct accurate testing but also provide tailored solutions based on your unique home layout and usage needs. They can also identify underlying issues such as dirty filters, oversized systems, or damaged ductwork that may contribute to imbalances.

Properly balanced airflow can make a noticeable difference in both comfort levels and long-term savings for homeowners—it’s an investment worth considering when optimizing an HVAC system’s functionality.


Cleaning air conditioner by water for clean a dust stock photo

An air conditioning unit plays a critical role in maintaining indoor comfort, especially during warmer months. However, like any mechanical system, it can develop issues over time. Identifying early warning signs of AC malfunctions can save you from costly repairs and uncomfortable downtime. Below are some key indicators that your AC unit may require immediate attention from an HVAC professional.

1. Insufficient Cooling or Inconsistent Temperatures

One of the most obvious signs that your air conditioning system needs repair is when it fails to cool your space effectively. If you notice hot spots or inconsistent temperatures throughout your home or office, this could indicate:
– Low refrigerant levels
– A malfunctioning compressor
– Faulty thermostats

By addressing these problems promptly, you can restore cooling efficiency and ensure your system operates optimally.

2. Unusual Noises During Operation

An AC unit should run relatively quietly under normal conditions. If you hear unusual sounds such as grinding, screeching, banging, or hissing coming from the system, it is essential to investigate further. These noises may stem from:
– Loose or broken components
– Worn-out belts or bearings
– Refrigerant leaks

Strange sounds often signal mechanical failure and should not be ignored.

3. Foul Odors Coming from the Vents

Unpleasant smells emanating from your air vents are another red flag. Musty odors might suggest mold growth within the ductwork or inside the AC unit itself due to excessive moisture buildup. Burning smells could indicate electrical issues such as overheating wires or burnt insulation.

Regular maintenance can help prevent these issues by ensuring proper drainage and cleaning of internal components.

4. Increased Energy Bills Without a Clear Cause

If your energy bills have spiked unexpectedly despite no significant changes in usage patterns, this could point to an inefficient AC system working harder than necessary to cool your home. Some common reasons for increased energy consumption include:
– Dirty air filters restricting airflow
– Leaking refrigerant causing reduced efficiency
– Malfunctioning components that overwork the system

A professional inspection can help diagnose and resolve these inefficiencies.

Table: Common Warning Signs and Their Potential Causes

Symptom Potential Cause Action Needed
Warm air blowing from vents Low refrigerant levels or compressor issues Call for professional repair
Loud noises Loose parts, damaged belts Inspect and replace damaged parts
Musty smell Mold growth due to blocked drainage Clean ducts and drain lines
High energy bills Restricted airflow or leaking refrigerant Perform a thorough HVAC check

5. Frequent Cycles Turning On and Off

Short cycling occurs when an AC unit turns on and off too frequently without completing a proper cooling cycle. This issue not only compromises comfort but also puts added wear on components like the compressor. Potential causes include oversized systems, dirty evaporator coils, or thermostat problems.

Why Prompt Repairs Matter

Addressing minor issues early on can prevent them from escalating into more serious problems that require expensive repairs or even full replacement of the unit. Furthermore, consistent maintenance ensures optimal performance while extending the lifespan of your HVAC system.

By paying attention to these warning signs and taking swift action when needed, you ensure that your cooling system remains reliable throughout its operational life span.

How Poor Airflow Can Indicate the Need for San Antonio AC Repair

Poor airflow in your HVAC system is not just a minor inconvenience; it may signal serious underlying issues that require prompt attention. Proper airflow is essential for maintaining comfortable indoor temperatures and ensuring energy efficiency. Without addressing poor airflow, your HVAC system may become less effective over time and lead to costly repairs.

Understanding Common Causes of Poor Airflow During Air Conditioning Repair San Antonio TX

  • Clogged Air Filters
    Dirty or clogged air filters limit the amount of air that can pass through, reducing the efficiency of your entire system. Filters should be replaced routinely to avoid this issue.
  • Blocked or Leaky Ducts
    Dust, debris, or even pests can block air ducts, while leaks in the ductwork can reduce overall airflow. Both scenarios negatively impact performance and comfort.
  • Blower Motor Issues
    The blower motor is responsible for pushing air through your ducts into various rooms. A failing motor will struggle to circulate air properly throughout the home.
  • Frozen Evaporator Coils
    Frozen coils often occur due to refrigerant issues or restricted airflow caused by blocked vents. When coils freeze, they restrict proper cooling and further diminish airflow.
  • Dirty Condenser Unit
    If the outdoor condenser unit is obstructed by dirt or debris, it cannot properly expel heat from your home, which may result in insufficient airflow indoors.

Identifying Poor Airflow with a Trusted HVAC Company San Antonio TX

  • Hot and cold spots throughout different areas of your home
  • Reduced air pressure coming from vents
  • Increase in humidity levels indoors
  • Whistling sounds from vents indicating obstructions
  • Rising energy bills without significant changes in usage patterns

Troubleshooting Tips for Homeowners

  1. Check and Replace Air Filters: Ensure filters are clean and free from buildup.
  2. Inspect Vents and Registers: Verify that they are open and unobstructed by furniture or drapes.
  3. Clean Around Outdoor Units: Remove leaves, dirt, or debris from around the outdoor condenser unit.
  4. Seal Leaks Around Ducts: Use duct tape or a sealant as a temporary fix for visible leaks in ductwork.

Why You Shouldn’t Ignore Poor Airflow

Ignoring poor airflow can strain your HVAC system over time, leading to more frequent breakdowns and expensive repairs. Additionally, reduced efficiency will result in higher utility bills as your system works harder than necessary to maintain desired temperatures.

Issue Consequence
Increased Energy Consumption Higher monthly utility bills
Accelerated System Wear Shortened lifespan of components
Decreased Indoor Comfort Uneven temperatures across living spaces
Potential Health Concerns Poor indoor air quality due to dust buildup

When to Call an HVAC Professional

If basic troubleshooting doesn’t resolve the issue, it’s important to contact a licensed HVAC technician who has expertise in diagnosing complex problems like failing blower motors or refrigerant leaks. Addressing these issues early ensures optimal performance and avoids long-term damage.

Poor airflow is not something that should be taken lightly when it comes to maintaining an efficient and reliable heating and cooling system. By identifying problems early on and seeking professional help when needed, you’ll ensure a more comfortable home environment while avoiding unnecessary costs down the line.

Technician with screwdriver repairing air conditioner at home stock photo

Understanding Strange Sounds from Your HVAC System and What They Mean

A well-functioning HVAC system typically operates quietly, with only a soft hum or gentle airflow sound. When unusual or loud noises emerge, it’s often a sign of underlying issues that require prompt attention. Ignoring these sounds can lead to more extensive damage and costly repairs. Below are some common strange sounds you may encounter and what they could indicate.

Types of Strange Sounds and Their Possible Causes

  1. Likely Cause: Loose or broken parts, such as connecting rods, pistons, or crankshafts in the compressor.
  2. Additional Possibility: A misaligned or broken blower fan blade.
  3. Action Needed: Shut off the unit to prevent further damage and contact a professional technician.
  4. Likely Cause: Electrical issues such as faulty relays or failing capacitors.
  5. Additional Possibility: Obstructions in the blower fan.
  6. Action Needed: Schedule an inspection to fix electrical components or clear debris.
  7. Likely Cause: Worn-out motor bearings or a damaged blower belt.
  8. Additional Possibility: High pressure in the compressor unit.
  9. Action Needed: Replace worn-out parts immediately to avoid overheating.
  10. Likely Cause: Refrigerant leaks in coils or piping.
  11. Additional Possibility: Internal valve leaks causing air pressure imbalances.
  12. Action Needed: Call an HVAC professional for refrigerant recharge and leak sealing.
  13. Likely Cause: Loose screws, nuts, or bolts within the unit housing.
  14. Additional Possibility: Debris trapped inside the system’s vents or ducts.
  15. Action Needed: Secure loose parts and remove debris promptly.
  16. Likely Cause: Damaged electrical components such as wiring, contactors, or transformers.
  17. Action Needed: Have the electrical system inspected by a licensed technician to avoid potential safety risks.

Why It’s Important to Address Strange Noises Quickly

  • Increased wear and tear on internal components
  • Reduced energy efficiency
  • Higher utility bills
  • Complete system failure over time

Taking prompt action not only ensures your comfort but also extends your HVAC system’s lifespan while reducing long-term repair costs.

Table of Common Noises and Their Implications

Noise Type Potential Issue Severity Level Recommended Action
Banging Loose/broken internal parts High Turn off & call a technician
Clicking Electrical malfunction Moderate Schedule inspection
Squealing Worn-out bearings/damaged belt High Replace part immediately
Hissing Refrigerant leak High Professional servicing required
Rattling Loose screws/debris Low Tighten/remove debris
Buzzing Electrical wiring/contactors issue Moderate to High Immediate professional checkup

How Regular Maintenance Can Help Prevent Noise Issues

  • Inspect Moving Parts: Regularly check for wear on belts, bearings, and fans.
  • Lubricate Components: Proper lubrication ensures smooth operation of moving parts like motors and fans.
  • Clean Vents: Remove dirt and debris from ducts and vents regularly to prevent rattling sounds caused by obstructions.
  • Check Electrical Systems: Periodic inspection of wiring and connections reduces risk associated with buzzing or clicking sounds.

By addressing issues proactively through routine maintenance, you can reduce your chances of encountering unusual noises while ensuring optimal performance year-round.

Addressing Higher Utility Bills: When It’s Time to Repair Your HVAC System

If you’ve noticed a sudden or gradual increase in your utility bills without any significant changes in your energy usage, it may be time to evaluate the performance of your HVAC system. Rising energy costs are often one of the first indicators that your heating, ventilation, or air conditioning unit is struggling to operate efficiently. Below, we’ll explore the causes of higher utility bills and provide actionable steps to address these issues.

Common Reasons for Higher Utility Bills

  1. Air filters trap dust, debris, and allergens to maintain clean airflow throughout your home.
  2. When filters are clogged, the system is forced to work harder, consuming more energy.
  3. Solution: Replace or clean filters every 1-3 months depending on manufacturer recommendations.
  4. Cracks or gaps in ductwork can cause conditioned air to escape before it reaches your living space.
  5. This not only wastes energy but reduces indoor comfort levels as well.
  6. Solution: Seal leaks and insulate ducts professionally for optimal efficiency.
  7. Older units lose efficiency over time due to wear and tear on components.
  8. Systems older than 10-15 years may no longer meet modern energy efficiency standards.
  9. Solution: Upgrade to a newer Energy Star-certified model if repairs become frequent.
  10. Low refrigerant levels can compromise cooling performance while increasing energy consumption.
  11. Leaks in refrigerant lines are a common culprit behind inefficient operation.
  12. Solution: Schedule professional diagnostics and repair for refrigerant-related problems.
  13. A faulty thermostat may fail to accurately regulate temperature settings, causing overuse of the system.
  14. Incorrect installation or outdated programming can also lead to inefficiencies.
  15. Solution: Calibrate or replace the thermostat as needed.

Steps You Can Take Now

  • Inspect air filters monthly and replace them regularly.
  • Check for visible ductwork damage like tears or disconnected sections.
  • Use programmable thermostats with schedules tailored around when you’re home versus away.
  • Set temperatures conservatively (around 78°F in summer and 68°F in winter).
  • Clean exterior AC units: Remove debris such as leaves and dirt around outdoor condensers to improve airflow.

Comparing Costs: Repair vs. Replacement

Factor Repair Replacement
Cost Moderate (varies per issue) Higher upfront but long-term savings
Energy Efficiency Improves slightly but limited by age Significantly better with new models
Lifespan Extension Adds a few years Typically lasts 10-15+ years

If repairs are becoming more frequent and costly compared to replacing the unit outright, it may be worth investing in a new system designed with advanced technology for greater efficiency.

The Importance of Timely Action

Ignoring higher utility bills could lead to compounded problems down the line. In addition to increased energy costs, an overworked HVAC system is more prone to breakdowns that require expensive emergency repairs. By addressing these issues promptly through regular maintenance or professional service calls, you’ll not only reduce your expenses but also extend the lifespan of your equipment while ensuring consistent indoor comfort year-round.

By understanding how rising utility costs connect back to HVAC performance issues, homeowners can take proactive measures that save both money and stress over time.

Why Unwanted Moisture or Leakage Signals the Need for HVAC Repair

Moisture or leakage in or around your HVAC system is more than just an annoyance—it’s often a sign of an underlying issue that demands immediate attention. Whether it’s a minor water leak or noticeable condensation, these problems can escalate if not addressed promptly. Below, we’ll discuss why unwanted moisture occurs, what it means for your system, and how to address the root causes effectively.

Common Causes of Moisture or Leakage in Your HVAC System

  1. The condensate drain line is responsible for removing excess moisture from your system. Over time, it can become clogged with dirt, mold, or debris.
  2. Signs of a clogged condensate line include pooling water near the unit or visible leaks.
  3. Low refrigerant levels can lead to insufficient cooling and may cause coils to freeze and thaw repeatedly, resulting in excess moisture.
  4. Refrigerant leaks should always be repaired by a certified technician.
  5. A neglected air filter restricts airflow, which can lead to frozen evaporator coils that eventually produce excess water as they thaw.
  6. A cracked or rusted drain pan will fail to collect and direct condensation properly.
  7. This issue is particularly common in older units that haven’t been maintained regularly.

Potential Risks Associated with Moisture Problems

  • Structural Damage: Prolonged exposure to leaks can damage walls, ceilings, and flooring materials.
  • Mold Growth: Consistent moisture creates the perfect environment for mold and mildew, which pose health risks for occupants.
  • Decreased Efficiency: Leaks often signal inefficiencies within the system, leading to increased energy consumption and reduced cooling performance.
  • Costly Repairs: Small issues left untreated can evolve into more significant problems requiring expensive repairs or even full system replacement.

Steps to Address Unwanted Moisture

  • Prevent further damage by powering off the unit until a professional can assess the issue.
  • Check for obvious signs of clogging in the drain line or damage to the drain pan.
  • Avoid attempting extensive repairs yourself unless you are experienced with HVAC systems.
  • Licensed technicians are equipped with specialized tools to clean blocked lines, recharge refrigerants properly, and repair damaged components safely.
  • Routine maintenance checks help identify potential issues before they develop into costly problems.
  • Replace air filters regularly and inspect external components monthly for signs of wear and tear.

Maintenance Tips To Prevent Future Moisture Problems

Task Frequency Purpose
Clean/Replace Air Filters Every 1-3 months Ensures proper airflow & prevents freezing
Inspect Condensate Line Every 6 months Reduces clogging risks
Schedule Professional Tune-Up Annually Identifies early warning signs
Check Drain Pan Condition Twice per year Avoids overflow from cracks/damage

By integrating these measures into your routine maintenance plan, you’ll extend your HVAC unit’s lifespan while ensuring it operates efficiently throughout its service life.

Addressing unwanted moisture in its early stages is key to avoiding expensive repair bills down the road. Recognizing these warning signs early not only protects your home but also ensures safe and effective operation for years ahead.

cleaning air filter wearing gray shirt and yellow gloves stock photo

Exploring Common Thermostat Problems and How They Impact HVAC Performance

The thermostat is a vital component of your HVAC system, acting as the control center that regulates temperature and ensures your home stays comfortable. However, when issues arise with the thermostat, it can disrupt the entire HVAC system’s operation. Below, we explore common thermostat problems, their potential consequences on HVAC performance, and how to address them effectively.

Common Thermostat Problems

  1. A miscalibrated or faulty thermostat may provide inaccurate temperature readings.
  2. This can cause your HVAC system to overwork or underperform, leading to discomfort in your home.
  3. An unresponsive thermostat often indicates dead batteries, wiring issues, or internal hardware failures.
  4. Without proper communication between the thermostat and the HVAC system, heating or cooling functions may cease altogether.
  5. If the HVAC system frequently turns on and off (short cycling), it could be due to a malfunctioning thermostat unable to maintain a set temperature.
  6. Short cycling decreases energy efficiency and wears out components faster.
  7. Programmable thermostats require proper settings for schedules and temperature preferences.
  8. Incorrect programming can lead to undesired temperature levels or unnecessary energy use.
  9. If placed near windows, direct sunlight, or heat sources like appliances, thermostats may misread ambient room temperatures.
  10. This results in inefficient operation of your heating or cooling systems.

How Thermostat Problems Affect HVAC Performance

  • Reduced Energy Efficiency: Faulty thermostats force your system to work harder than necessary, increasing energy consumption and utility bills.
  • Uneven Temperatures: A malfunctioning thermostat can lead to hot or cold spots throughout your home due to improper regulation.
  • Increased Wear on Components: Consistent short cycling caused by a defective thermostat accelerates wear-and-tear on motors and compressors.
  • System Reliability Issues: Over time, unresolved thermostat issues may result in complete system failure requiring costly repairs or replacements.

Troubleshooting Tips for Common Issues

Problem Potential Solution
Inaccurate readings Check for dust buildup inside the device; clean if needed.
Unresponsive screen/buttons Replace batteries or check wired connections.
Short cycling Verify placement location; avoid areas with extreme temperatures.
Incorrect programming Reset schedule settings according to user manual guidance.

When Professional Help Is Needed

  • Wiring issues that require safe handling
  • Calibration problems that need specialized tools
  • Persistent short cycling despite troubleshooting efforts
  • Upgrading thermostats (e.g., installing smart models)

Ignoring common thermostat problems can escalate minor inconveniences into costly repairs down the line. Regular maintenance checks by an experienced HVAC technician ensure optimal performance of both your thermostat and overall heating/cooling systems while extending their lifespan effectively.

Determining When an Old HVAC Unit Should Be Repaired or Replaced

When it comes to an aging HVAC system, determining whether to repair or replace it can be a challenging decision. Various factors, such as the unit’s age, efficiency, repair costs, and overall performance, play a crucial role in making the right choice. Below is a detailed guide to help you evaluate your options and make an informed decision.

Factors to Consider for Repair vs. Replacement

  1. Most HVAC systems have a lifespan of 10-15 years for air conditioning units and 15-20 years for furnaces.
  2. If your system is nearing the end of its expected lifespan and requires frequent repairs, replacement might be more cost-effective in the long run.
  3. A good rule of thumb is the “50% Rule”: If the cost of repairs exceeds 50% of the cost of a new system, replacement may be more economical.
  4. Repeated breakdowns or major component failures (e.g., compressors or heat exchangers) often indicate that it’s time to upgrade.
  5. Older units may lack modern energy-efficient features such as variable-speed motors or high SEER (Seasonal Energy Efficiency Ratio) ratings.
  6. Upgrading to an Energy Star-certified HVAC unit can significantly reduce utility bills while improving comfort levels.
  7. Uneven heating or cooling throughout your home could point to system inefficiencies.
  8. Excessive noise during operation is another sign that components may be wearing out.
  9. Older systems often use outdated refrigerants like R-22, which are being phased out due to environmental concerns.
  10. Newer units utilize eco-friendly alternatives like R-410A, making them both environmentally responsible and compliant with current regulations.

Repair vs. Replace: A Quick Comparison Table

Factor Repair Replace
System Age Less than 10 years Over 10-15 years
Cost Minor repairs (<30%) Major repairs (>50%)
Efficiency Relatively efficient Low efficiency
Frequency of Breakdowns Rare Frequent
Refrigerant Modern refrigerant Outdated refrigerant

Benefits of Replacement

  • Improved Energy Efficiency: Save up to 20%-40% on energy bills with a high-efficiency model.
  • Enhanced Comfort: Modern systems provide better temperature consistency and humidity control.
  • Fewer Repairs: New equipment reduces unexpected breakdowns and costly service calls.
  • Eco-Friendly Performance: Lower environmental impact thanks to advanced technology and compliant refrigerants.

When Repair May Be Suitable

  • The unit is under 10 years old with no history of frequent issues.
  • The repair costs are minimal compared to replacement expenses.
  • The system meets current energy standards but needs minor fixes like duct sealing or replacing worn components.

Tips for Making an Informed Decision

  1. Request a professional inspection from qualified HVAC technicians who can assess your unit’s condition comprehensively.
  2. Obtain multiple quotes for both repair and replacement options.
  3. Consider financing options or rebates available for new energy-efficient systems if you decide on replacement.

By carefully evaluating these factors alongside professional input, you can ensure an optimal solution tailored to your home’s specific needs while maximizing long-term value from your investment in heating and cooling comfort.


Mechanic air conditioner technician using manifold gauge checking refrigerant for filling home air conditioning and air duct cleaning and maintenance outdoor compressor unit. stock photo

Your air conditioning system is a critical component of home comfort, especially during warmer months. When issues arise, addressing them promptly can save you from costlier repairs down the road. Below are some key signs that your air conditioning unit may need immediate attention.

Unusual Noises

  • Banging: Potentially caused by loose or broken parts inside the compressor.
  • Hissing: May indicate a refrigerant leak or an issue with ductwork seals.
  • Squealing: Often related to a failing belt or motor bearing problems.

These noises should not be ignored as they can lead to larger mechanical failures over time.

Poor Airflow

  • Clogged air filters restricting circulation
  • Blocked vents preventing cool air from moving throughout your home
  • Malfunctioning blower motors reducing the system’s efficiency

Improving airflow through routine maintenance can sometimes resolve minor issues, but persistent problems may require professional repair services.

Warm Air Coming From Vents

  1. A refrigerant leak affecting the cooling process.
  2. A malfunctioning compressor unable to circulate refrigerant properly.
  3. Incorrect thermostat settings or faulty wiring in the thermostat itself.

Warm airflow reduces overall comfort and stresses other components of the HVAC system if left unresolved.

High Humidity Indoors

  • Oversized or undersized AC units incapable of maintaining appropriate humidity levels.
  • Dirty coils reducing dehumidification efficiency.
  • Refrigerant leaks disrupting normal cooling cycles.

Addressing high humidity promptly can prevent mold growth and other long-term damage to indoor spaces.

Frequent Cycling On and Off

Possible Cause Description
Thermostat Malfunctions Faulty readings causing improper cycling behavior
Refrigerant Level Issues Insufficient refrigerant leading to early shutoff
Oversized Cooling System System too large for home size, leading to inefficiency

Short cycling wastes energy and places undue stress on key components like compressors and fans.

Rising Energy Bills

  • Dirty filters forcing the unit to work harder.
  • Aging systems nearing the end of their lifespan.
  • Leaky ducts wasting cooled air before it reaches intended areas.

Monitoring monthly energy usage trends can help identify when professional attention is needed for your air conditioner.

By recognizing these warning signs early and scheduling timely repairs, you can prolong the life of your HVAC system while ensuring consistent performance year-round.

Common Causes of AC Short Cycling and How to Fix Them in AC Repair San Antonio TX

Air conditioner short cycling is one of the most common issues HVAC systems face. Short cycling occurs when your AC unit turns on and off repeatedly in a short period, preventing it from completing its cooling cycle. This not only impacts performance but also increases wear and tear, leading to higher energy bills and potential system failure. Below, we’ll explore the primary causes of short cycling, how to identify them, and possible fixes.

Common Causes of AC Short Cycling

  1. When air filters are clogged with dirt or debris, airflow is restricted. This forces the unit to work harder, often causing it to cycle off prematurely.
  2. Regular filter replacement can help avoid this issue.
  3. Low refrigerant levels or refrigerant leaks can disrupt the cooling process by causing pressure imbalances within the system.
  4. Signs include ice buildup on coils or insufficient cooling.
  5. If your air conditioning system is too large for your space, it will cool the area quickly but unevenly, leading to frequent on-off cycles.
  6. A properly sized unit ensures consistent performance.
  7. Placing the thermostat near heat sources (like windows or electronics) can cause incorrect temperature readings.
  8. Faulty thermostats may also fail to detect temperatures accurately.
  9. Loose wiring or faulty connections can prevent components from functioning properly, resulting in frequent shutdowns.

Warning Signs of AC Short Cycling

  • The compressor turns on and off every few minutes instead of running through a full cooling cycle.
  • Uneven cooling throughout your home with hot spots still present.
  • A spike in energy bills despite no significant change in usage.
  • Unusual noises such as clicking or humming between cycles.

Fixes for AC Short Cycling

Cause Solution
Dirty Air Filter Replace filters every 1–3 months during peak seasons for optimal airflow.
Low Refrigerant Levels Have an HVAC technician check for leaks and recharge refrigerant as needed.
Oversized System Consult an HVAC professional about upgrading to a properly sized unit.
Thermostat Issues Relocate the thermostat away from heat sources or replace if malfunctioning.
Electrical Problems Schedule an inspection with a licensed HVAC technician to identify wiring issues.

Preventing Future Short Cycling

To maintain your air conditioning system’s efficiency and avoid recurrent short cycling problems:
– Schedule regular maintenance checks (preferably twice per year).
– Clean ducts periodically to ensure proper airflow throughout your home.
– Monitor refrigerant levels during routine servicing visits by professionals.

By understanding these causes and addressing them promptly with appropriate solutions, you can extend your HVAC system’s lifespan while improving energy efficiency in your home.

Common Reasons for Air Conditioning Repair San Antonio TX: Fixing AC Short Cycling Issues

AC short cycling is a common yet frequently misunderstood issue that can lead to inefficient cooling, increased energy consumption, and unnecessary wear on your HVAC system. Short cycling occurs when your air conditioner turns on and off too frequently without completing a full cooling cycle. Below, we explore the causes of this problem and practical solutions to address it.

Common Causes of AC Short Cycling

  1. If the thermostat is located in direct sunlight or near heat-generating appliances, it may detect higher temperatures inaccurately, causing the AC to turn on and off unnecessarily.
  2. Faulty thermostats may also send incorrect signals to the unit.
  3. Low refrigerant levels can trigger short cycling as the system struggles to maintain proper pressure. This could indicate a refrigerant leak that needs immediate attention.
  4. A clogged filter restricts airflow, causing the system to overheat and shut down prematurely as a safety measure. Over time, this cycle repeats.
  5. An improperly sized unit cools small spaces too quickly, leading to frequent cycles that wear out parts faster than normal operation would.
  6. Loose wiring or malfunctioning capacitors within the system can disrupt normal functioning, leading to irregular cycling patterns.

Consequences of Ignoring Short Cycling

Failing to address short cycling not only compromises comfort but also leads to:
Increased Energy Bills: Frequent starts and stops can spike electricity consumption. – Reduced Equipment Lifespan: The strain caused by inadequate cycles puts unnecessary stress on components. – Poor Humidity Control: Short cycles don’t allow enough time for proper dehumidification.

Fixes for AC Short Cycling Issues

  1. Relocate or Calibrate the Thermostat
    Ensure your thermostat is correctly placed in an area free from direct sunlight or heat sources. Check its settings or consult an HVAC professional for recalibration.
  2. Check Refrigerant Levels
    If you suspect low refrigerant levels, hire a certified technician who can identify leaks and perform necessary repairs before recharging the system with refrigerant.
  3. Replace Dirty Filters Regularly
    Replacing air filters every 1–3 months ensures unrestricted airflow and prevents overheating-related cycling issues.
  4. Evaluate System Size
    For oversized units presenting persistent problems, consulting an expert for replacement options might be more cost-effective in the long term.
  5. Inspect Electrical Components
    Address any damaged wiring or failing components promptly with professional assistance to prevent further complications.

Preventative Maintenance Tips

  • Schedule annual HVAC tune-ups to identify potential issues early.
  • Clean vents regularly to improve airflow throughout your home.
  • Monitor energy bills for unexpected spikes that may signal operational inefficiencies.
  • Test your thermostat periodically for accurate temperature readings.
Task Frequency Benefits
Replace air filters Every 1–3 months Improved airflow & efficiency
Inspect vents Monthly Maintains consistent cooling
Schedule HVAC tune-up Annually Early detection of potential problems
Monitor energy usage Ongoing Identifies inefficiencies quickly

Short cycling is preventable with regular care and prompt action when issues arise, saving you both time and money while ensuring consistent comfort throughout your home year-round.

Aircondition service and maintenance, fixing AC unit and cleaning the filters. stock photo

Identifying Air Conditioner Issues with a Trusted HVAC Company San Antonio TX

When your air conditioner begins to deliver warm air or weak airflow, it’s often a sign that something isn’t functioning correctly. Addressing these issues promptly can help prevent more significant and costly problems later. Below are the key causes and indicators of this issue, along with what steps you can take to resolve them.

Common Causes of Warm or Weak Airflow

  1. Dust, dirt, and debris buildup in the air filters restrict airflow, causing the system to blow weakly or even produce warm air.
  2. Filters should ideally be cleaned or replaced every 1-3 months, depending on usage and environment (e.g., households with pets may need more frequent replacements).
  3. Insufficient refrigerant levels can hinder the cooling process, leading to warm air being circulated through your home.
  4. Look for signs such as ice buildup on the evaporator coils or hissing noises around refrigerant lines as potential indicators of a leak.
  5. The blower motor is responsible for pushing cooled air through your ducts and vents. If it’s failing or running inefficiently, this can result in poor airflow.
  6. Obstructed vents (either from furniture placement or debris) reduce how much cool air enters your living spaces.
  7. Cracks, punctures, or detachment in the ductwork may also cause conditioned air to escape before reaching its destination.
  8. Over time, dust accumulates on evaporator coils, reducing their ability to absorb heat effectively.
  9. Routine maintenance is necessary to ensure coils remain clean and functional.

How to Identify if Your AC Needs Repair

  • Air Temperature at Vents: Test whether cool air is blowing out by placing your hand near a vent after running the system for 10-15 minutes.
  • Uneven Cooling: Some rooms feel significantly warmer than others despite similar vent placement.
  • Increased Humidity Levels: A properly functioning AC unit helps manage indoor humidity; persistently muggy conditions indicate an issue.
  • Frequent Cycling: The system turns on and off repeatedly without maintaining desired cooling levels.

Steps You Can Take Before Calling a Professional

  1. Ensure all supply and return vents are open and unobstructed by furniture or other items.
  2. Replace dirty filters if they appear clogged with dust or debris.
  3. Check that doors and windows are fully closed during operation to prevent conditioned air from escaping.
  4. Verify that your thermostat settings haven’t accidentally been adjusted—set it to “cool” mode at an appropriate temperature setting.

When Professional Help is Necessary

  • Repair damaged motors, ducts, compressors, and other components.
  • Recharge refrigerant levels safely while identifying leak sources.
  • Perform diagnostic tests that pinpoint underlying causes not obvious to homeowners.

Investing in timely repairs ensures optimal performance from your AC unit while extending its lifespan.

By addressing these problems quickly and implementing regular maintenance practices like filter changes and inspections, homeowners can keep their cooling systems running efficiently throughout the warmer months without interruption.

How Rising Energy Bills Can Indicate Problems with Your HVAC System

Rising energy bills can be frustrating, especially when there is no apparent reason for the increase. In many cases, these unexplained spikes may point to underlying issues within your HVAC system. Understanding the connection between higher energy costs and HVAC performance can help homeowners address problems before they escalate.

Common HVAC Issues That Increase Energy Consumption

  • Reduced airflow forces the system to work harder.
  • Can lead to overheating or excessive wear on components.
  • Solution: Replace air filters every 1-3 months, depending on usage and manufacturer recommendations.
  • Conditioned air escapes before it reaches your living space.
  • Results in uneven cooling or heating and wasted energy.
  • Solution: Have a professional inspect and seal ducts where necessary.
  • Low refrigerant levels reduce cooling efficiency.
  • Overworking the compressor can shorten its lifespan while increasing electricity use.
  • Solution: Schedule regular maintenance to check refrigerant levels and identify leaks promptly.
  • Older units are less efficient compared to modern systems with advanced technology.
  • Worn-out parts force the system to consume more power than necessary.
  • Solution: Consider upgrading outdated equipment or replacing failing components.

Signs Your Energy Bills May Be Linked to an HVAC Problem

  1. Uneven Temperature Distribution – Some rooms feel significantly warmer or cooler than others despite consistent thermostat settings.
  2. Frequent Cycling On and Off – Short cycling wastes energy and puts unnecessary strain on the system.
  3. Unusual Noises or Smells – Strange sounds or odors often indicate mechanical issues that may affect efficiency.
  4. Longer Run Times – If your unit runs continuously without maintaining comfortable indoor temperatures, it’s likely working harder than required.

Preventative Measures to Keep Costs Under Control

  • Schedule annual tune-ups for both heating and cooling systems.
  • Invest in a programmable thermostat for better temperature control.
  • Clean vents regularly to prevent airflow obstructions.
  • Ensure proper insulation throughout your home to reduce strain on the HVAC system.
Problem Symptom Suggested Action
Dirty Air Filters Weak airflow Replace filters regularly
Leaking Ducts Uneven temperatures Seal ductwork
Low Refrigerant Poor cooling performance Refill/repair leak
Aging Components Higher operating costs Upgrade/repair equipment

Tracking changes in your utility usage over time is another effective way to spot potential HVAC issues early. By addressing problems as soon as they arise, you can avoid expensive repairs while enjoying consistent comfort in your home.

back female Worker holds brush from portable steam generator for maintenance air condition stock photo

Tune Up vs. Repair vs. Replacement: Deciding What Your HVAC System Really Needs

When your HVAC system begins to show signs of trouble, deciding whether to get a tune-up, a repair, or a full replacement isn’t always straightforward. Each option has its own set of benefits and is suited to specific situations. Below is a detailed guide to help you determine the most appropriate course of action for your system.

When Should You Consider a Tune-Up?

A tune-up is typically the first step in maintaining an HVAC system that may not be performing at peak capacity but isn’t showing major issues. It focuses on preventive maintenance and fine-tuning the system for optimal efficiency.

Signs Your HVAC Needs a Tune-Up:
– Minor issues such as reduced airflow or temperature fluctuations. – Unusual but faint noises, such as clicking or humming. – A year has passed since your last maintenance check. – Increasing energy bills without significant changes in usage.

What’s Included in an HVAC Tune-Up?
A professional tune-up generally involves:
– Cleaning or replacing air filters.
– Inspecting and tightening electrical connections.
– Lubricating moving parts to reduce wear and tear.
– Checking refrigerant levels and pressures.
– Testing thermostat calibration and functionality.

Opting for routine tune-ups can extend the lifespan of your system while reducing long-term repair costs.

Repair: Fixing Specific Problems

If your HVAC system malfunctions despite regular maintenance, repairs may be needed to address specific problems. Repairs are ideal when the issue can be isolated and fixed without jeopardizing other components of the unit.

Signs Your System Requires Repair:
– Warm air coming out instead of cool air during summer use. – Persistent strange noises like banging, rattling, or squealing. – Short cycling (the system turning on and off too frequently). – Water leaks around indoor units or refrigerant lines.

Common Repairs Include:
| Problem | Typical Solution | Estimated Cost | |—————————–|————————————|——————-| | Faulty thermostat | Thermostat recalibration/replacement | $100–$300 | | Refrigerant leaks | Leak repair & recharge | $200–$1,500 | | Worn-out fan motors | Motor replacement | $400–$700 | | Dirty condenser coils | Coil cleaning | $100–$400 |

Repairs are generally more cost-effective than replacements as long as the unit is not nearing the end of its lifespan.

Full Replacement: When It’s Time to Upgrade

Replacing an old or severely damaged HVAC unit is often the best choice for long-term performance and energy savings. While it may have higher upfront costs than repairs, new systems come with advanced features that can lower utility bills over time.

Signs It’s Time for a Replacement:
1. The unit is 10–15+ years old (for most systems).
2. Frequent breakdowns resulting in costly repairs within short intervals.
3. Rising energy bills despite attempted fixes or upgrades. 4. Inconsistent temperature regulation throughout your home. 5. The cost of repairs exceeds 50% of the price of a new unit (commonly referred to as the “50% rule”).

Benefits of Replacing Your System:
– Improved energy efficiency with newer technology (look for ENERGY STAR-rated systems).
– Enhanced comfort with better airflow control and modern thermostats like smart devices.
– Reduced carbon footprint due to lower energy consumption.

Summary: Matching Solutions With Issues

Situation Recommended Action
Minor inefficiencies Tune-Up
Isolated component failure Repair
Aging unit with frequent breakdowns Replacement

Consulting with an HVAC professional is essential when making these decisions so they can accurately assess your unique circumstances and recommend what’s best for your home’s needs—be it extending functionality through minor repairs or investing in a brand-new system designed for current standards in performance and efficiency.